For this week’s Lens Artists Photo Challenge #156, Anne from Slow Shutter Speed asks us to feature Black & White photos and talk about the workflow behind creating the images.
Why Black & White?
Go to any Photography site and you’ll find a list of reasons why Black & White photography is a good thing. Many of them recommend taking photos with intent, switching the camera to monochrome and actively selecting scenes with shadows and light. Well, I won’t pretend to have that expertise. Normally, I just deal with the specifics of a particular work set and experiment.
This particular set of photos is from a model shoot in Cuba. During the shoot I took all my pictures in color but saved them in RAW format. This is what I always do since 1) I don’t have the discipline to decide on treatment beforehand and 2) RAW files allow for maximum flexibility in post-processing.
Throughout the shoot, I took what I thought were good pictures. My focus was always on composition. I looked for emotive angles and unusual perspectives. Later though, when I viewed the shots in Lightroom, I was sorely disappointed. While some photos were good, many were not. A recurring issue was color.
Color Distraction
In this example, both I and the model were lying down on the floor of an outdoor patio. I was intrigued by the angle and curves of the model and spent lots of time positioning the shot. So much so that I forgot to look at the background.
Here you can see how much the colors in the background compete with each other. The geometric colors on wall contrast with the organic greens in garden. On the model, her vivid orange dress adds to the distraction. Everything in the top half of the photo grabs the eye and forces it to look at the edges of the frame. To my mind, the color photo looks terribly unbalanced.
Switching to black & white has an immediate effect. The confusion of color disappears. The background is neutralized and the dress becomes texture. Suddenly, the eye is drawn to the model and not the background.


Finding Contrasts
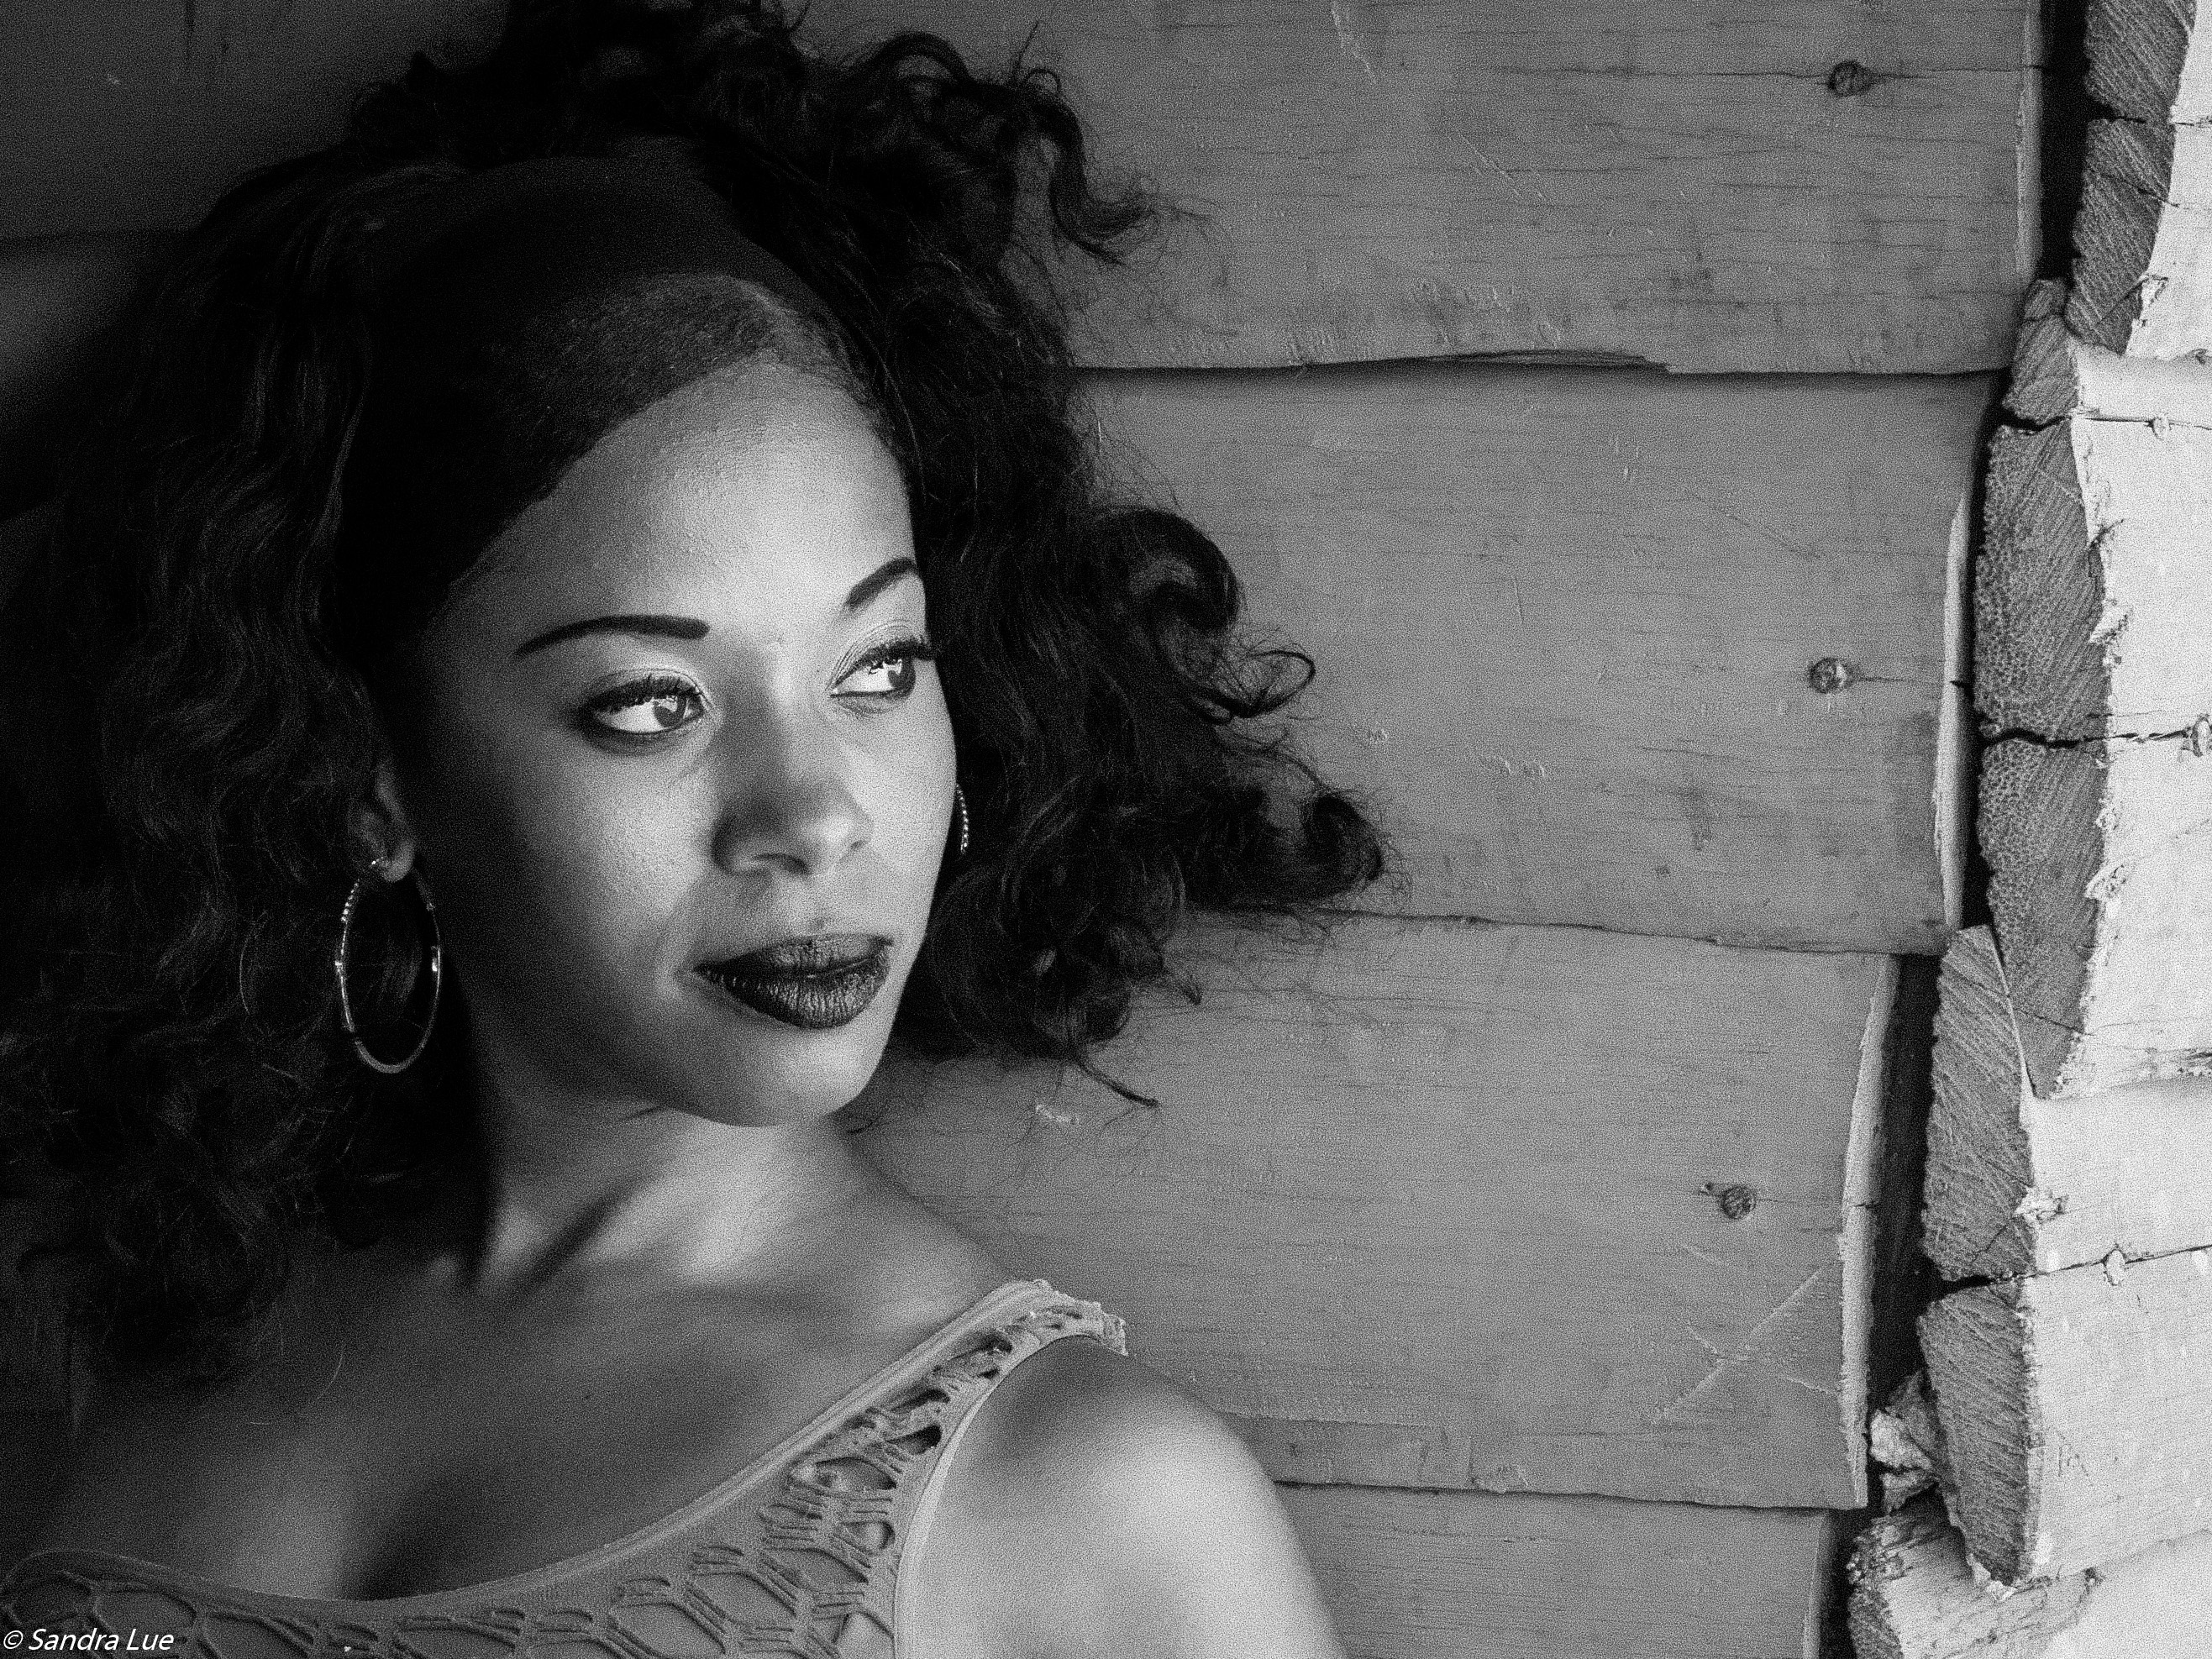
Elsewhere on location, there was a hut made with rough hewn planks and painted a light blue. I had an idea to play with color and offset the orange of her dress against the blue wood. It’d be a contrast of primary and secondary opposites on the color wheel.
In this case, I was pleased with both color and monochrome treatments. In color the contrast in blue & orange seems fresh and bright. In monochrome the distinction is in texture, the knots and whorls of the wood contrasting with the model’s skin tones.

Complementary Collections
In cases like the last picture, how then to decide on treatment? It depends on the context. At a certain point, I stop looking at pictures as singles and see them as parts of a whole. When looking at a collection, I care about consistency.
If I pull together a gallery of photos for a post, I usually stick to either all-color or all-monochrome. In my opinion, nothing is more visually jarring than a mixture of color & monochrome pictures on a page. Even if a photo looks better in color than monochrome, if it’s part of collection and all the other photos are monochrome, I’ll use it in monochrome.
Of course, there’s always exceptions to the rule. Sometimes a mixture is important. This post is an example 😉
I hope you found this interesting. I’ve been working on a collection of photos made from this model session. In my next post, I’ll share that with you, so stay tuned!

Excellent choices and analysis.
LikeLike
Thank you for saying so John!
LikeLiked by 1 person
This is an excellent description of the thought processes that go into photo editing decisions 🙂 I completely agree with you that the first photo works much better in B&W, although for slightly different reasons. In the colour version it’s the dress that stands out, whereas in the B&W I’m drawn immediately to her eyes. As to the second photo I prefer the B&W version there too but I agree (again) that the colour shot also works well.
LikeLiked by 1 person
It’s a matter of what draws the eye first and that first impression changes after looking at an image upteen times. That orange dress killed so many pictures I was inured to it at the time of writing 🙂
LikeLiked by 1 person
That’s true – you can look at an image TOO many times! Ideally I like to leave an edit for a day or two before sharing the photo, as I often find I see it differently after a break.
LikeLike
Fascinating! Thank you for this insight into photographer’s work. The results are stunning. In the first case, the conversion truly saves the shot. Pesky background! The second is beautiful either which way, but astonishingly different. I’ll say something that may be considered touchy ground: when converted, the model appears much whiter than she is. I can imagine that many wouldn’t be pleased with that.
LikeLiked by 1 person
That’s an interesting observation Manja. With B&W, light and color have a big effect on the final look. In my photos I favor bright contrasts & with portraits I’m always keen on emphasizing light hitting on features. Your comment made me go back & check what I actually did. You might be surprised to know that it all had to with manipulating color.
It started with the first one. I’d wanted to blur the background even more and to do that, I lightened the Green & Yellow hues. This also lightened her face, indicating there was some yellow & green reflections on her face that wasn’t obvious in the color photo. The same was true for the second photo – dialing up the green & yellow hues emphasized the lights on her face. It’s a bit of artistic choice to decide on how much light we want to see, but as I said .. I generally favor high contrast portraiture.
Interesting, huh? Who would have thought that color choices affect B&W!
LikeLiked by 1 person
Reading this, I felt a little out of my league being your co -host for Friendly Friday Blog Challenges. I am an amateur photographer only and think your first photo is still aesthetically pleasing. I can see that the colours are distracting from the model’s face. And black and white adds a pure focus on form, without colour to interfere with the experience.
Thanks for the little lesson, Sandy.
LikeLiked by 1 person
B&W focuses on form .. is a good way of putting it Amanda. I’m glad if this post pointed out something new for you.
LikeLike
😁
LikeLike
This is fascinating! I can see the difference that choosing B&W makes.
LikeLiked by 1 person
Glad you liked it.
LikeLike
This is a great tutorial on when and how to process a photo in black and white! Thank you for giving us your workflow and explanation as to why you chose to process these in black and white. Well done and thanks for participating in this challenge.
LikeLiked by 2 people
Thank you Anne. I appreciate you posing a challenge both on topic as well as process. It’s not often that we analyze our photos. It’s a good way to learn, both for me as I think through the choices and anyone else patient enough to read thru my analysis 😉
LikeLike